Embroidery sparks creativity and eases stress, much like coloring inside grown-up lines. You feel calm as your needle glides through fabric. Busy beginners love it because these hobbies fit small moments.
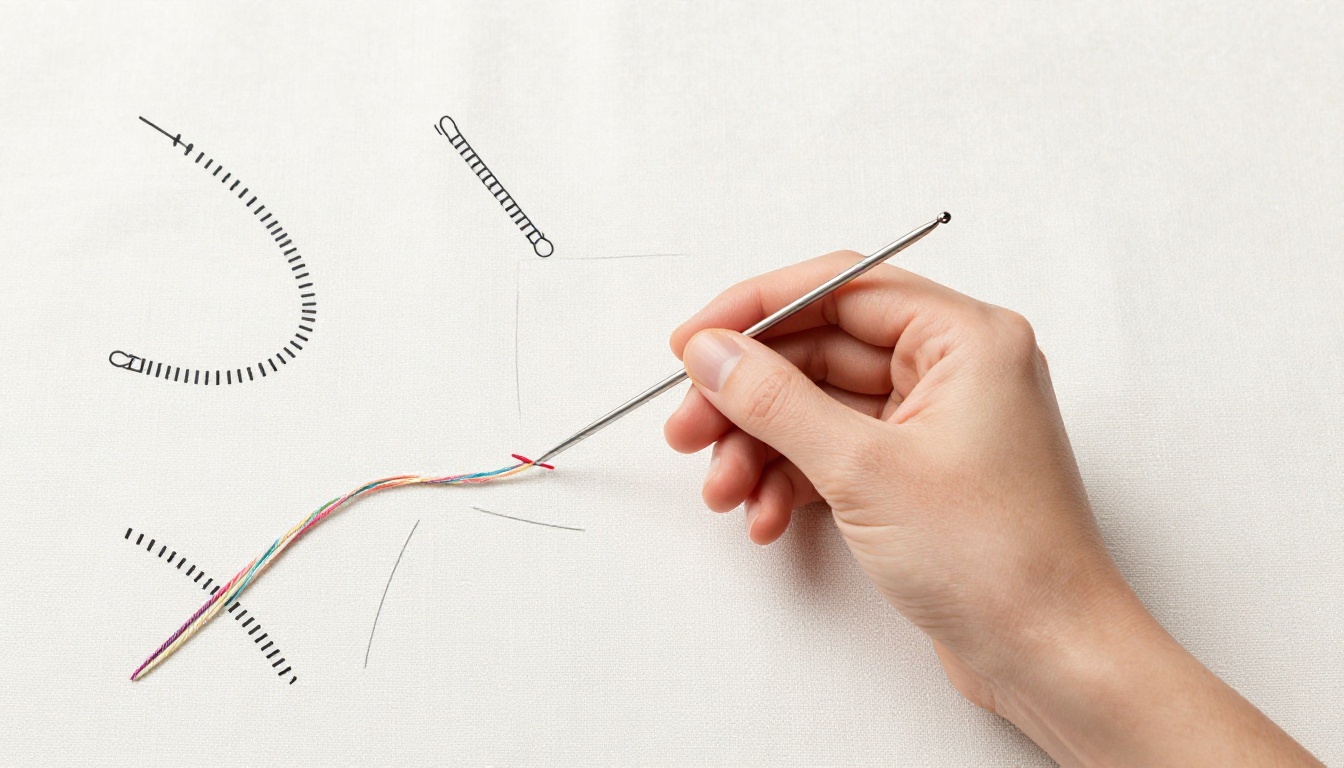
Mastering five basic stitches unlocks endless patterns. They include the running stitch for straight lines, backstitch for bold outlines, stem stitch for smooth curves, satin stitch for colorful fills, and French knot for textured dots. No skills required; just follow simple steps here.
You’ll get hands-on guides plus real tips. First, gather supplies. Then practice projects build confidence fast.
Build Your Starter Kit: Embroidery Supplies Explained
Start with basics to keep costs low. You need embroidery floss in primary colors like red, blue, and white. These cotton threads split into six strands for thin or thick lines.
Grab crewel needles sized 7 to 10. Their sharp tips pierce fabric easily without snags. Cotton fabric works best, such as tea towels or Aida cloth where holes show clearly.
A 6-inch plastic hoop holds fabric tight. Small sharp scissors cut threads cleanly. A water-soluble pen marks designs that wash away later. An optional thimble protects fingers from pricks.
All this costs under 20 dollars at craft stores. Pick fewer colors first. That way, you avoid overwhelm and focus on stitches.
Hoop Your Fabric Right for Tension-Free Stitching
Taut fabric stops puckers and歪 lines. Follow these steps for perfect setup.
- Lay fabric over the inner hoop ring. Center your design area.
- Place the outer ring over it. Push down evenly.
- Tighten the screw a bit at a time. Smooth wrinkles from center outward.
- Trim excess fabric if it bunches. Add a basting stitch around the edge for extra hold.
Loosen the screw to remove your finished piece. That prevents pulls or tears. Practice on scrap first; it saves frustration.
Master the Five Key Stitches: Hands-On Guides
These stitches form every design. Each one suits specific shapes. Practice 10 rows on scrap fabric before projects. You gain even spacing fast.
Running Stitch: Quick and Easy Straight Lines
This simplest stitch bastes edges or makes dotted paths. Beginners nail it in minutes. Use it for gathering fabric too.
Thread your needle and knot the end double. Anchor with a tiny stitch under fabric.
- Come up at point 1 from below.
- Go down at point 2, same length away.
- Come up at point 3, even space ahead.
- Repeat across the line.
- End with a knot hidden underneath.
Keep stitches uniform to match thread thickness. Tug gently for slight gathers. Avoid loose threads; they make work floppy. Instead, pull even tension each time.
Backstitch: Strong and Crisp Outlines
Backstitch creates durable borders like sewn seams. It outlines patterns or letters sharply. Work left to right for best flow.
Come up at your start point.
- Go down halfway to the next stitch spot.
- Come up at the end of that full space.
- Go down at the halfway mark again.
- Repeat, overlapping each stitch.
- Knot off underneath when done.
Match stitch size for smooth curves. It suits text well. Don’t start right to left; that twists lines. Practice reverses the mistake quick.
Stem Stitch: Graceful Curves and Stems
Stem stitch traces vines or flower stems beautifully. The thread twists around the line for grace. Short stitches hug tight bends.
Come up at the line’s start.
- Go down a stitch length away, offset to one side.
- Come up midway, but on the opposite side.
- Go down ahead, offset again.
- Repeat the twist pattern.
- Adjust length for curves or straights.
Come up beside the working thread, not through it. That keeps the rope-like look. Longer stitches speed straight sections. Piercing thread ruins the flow; dodge it every time.
Satin Stitch: Smooth Fills That Shine
Satin stitch fills petals or letters with solid color. It shines under light for polish. Outline shapes first for clean edges.
Come up on one edge of the shape.
- Go down straight across on the opposite edge.
- Come up next to your first stitch.
- Go down across again, side by side.
- Fill until covered, no gaps.
- Knot off inside the shape.
Pad big areas with running stitches underneath. Stitch same direction to stop twists. Overlap slightly; gaps show thread. Direction matters for flat results.
French Knot: Charming Dots and Textures
French knots add eyes, berries, or sparkles. They build texture in clusters. Wrap more for bigger dots.
Come up at your dot spot.
- Hold thread taut with your finger.
- Wrap it around the needle two or three times, close to fabric.
- Insert needle nearby, not touching the spot.
- Hold wraps down. Pull thread through gently from below.
- Repeat for more knots.
Use matching floss on back for neatness. Slide wraps off if they bunch. Pulling hard unravels them; go slow. Clusters make flowers pop.
Try These Projects: Turn Stitches into Creations
Apply your skills now. These use all five stitches. Each takes under an hour. Snap photos; share your wins online.
Sampler Hoop: See All Your New Skills Shine
Draw lines and shapes lightly with pen. Stitch samples of each type. Label names in stem stitch.
Hoop a 4×4 inch cotton square. Add running lines, backstitch borders, stem curves, satin fills, and knot dots. Mount taut for wall art. It shows progress at a glance.
Supplies match your kit. Frame it proud.
Personalized Patch: Customize Your Favorites
Trace a heart or initial on fabric. Combine stitches for depth.
Outline with backstitch. Add stems inside. Fill areas with satin. Dot accents use French knots. Iron onto a tote or hanky.
You need extra fabric and iron-on backing. This gift wows friends.
Practice Makes Your Stitches Shine
These five form your embroidery base. Running lines, backstitch edges, stem curves, satin fills, and knot dots cover most needs. Projects prove quick wins.
Grab supplies this week. Stitch that sampler tonight. Tag your makes; we feature favorites.
Advanced patterns wait next. Create gifts or decor that touch hearts. You’ve got this.